As the chill of winter fades and nature reawakens, the arrival of spring presents a wonderful opportunity to refresh our beauty routines. One of the most delightful ways to embrace the season is through floral nail art—an expressive and vibrant trend that captures the beauty of blooming flowers. Whether you are a nail art novice or a seasoned pro, floral designs are perfect for showcasing creativity, personality, and a touch of spring. This comprehensive guide will explore various floral nail art designs, techniques, and tips to help you bring the beauty of blossoms to your fingertips.
The Allure of Floral Nail Art
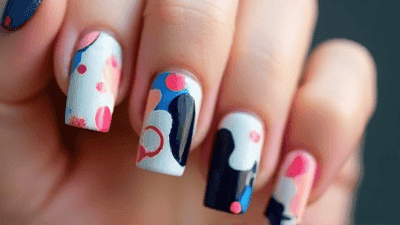
Floral nail art has a timeless charm that resonates with many. The connection between flowers and femininity has existed for centuries, making them a popular choice in nail design. From delicate daisies to bold roses, floral patterns can convey various moods—romantic, playful, elegant, or cheerful. The versatility of flowers allows for endless creativity, making it an ideal canvas for your artistic expression.
Why Choose Floral Designs for Spring
Spring is synonymous with blossoms and growth, making floral designs a perfect match for the season. Here are several reasons why floral nail art is especially popular during spring:
Vibrancy: Floral designs often incorporate bright, cheerful colors that reflect the lively spirit of spring. This is the perfect time to experiment with pastel shades or vivid hues that may have felt out of place in winter.
Versatility: Floral nail art can be adjusted to suit any style. Whether you prefer minimalist designs or intricate patterns, there’s a floral motif for everyone.
Symbolism: Flowers are often seen as symbols of renewal, growth, and beauty. Embracing floral nail art allows you to celebrate the essence of spring and the beauty it brings.
Personal Expression: Adding floral designs to your nails can reflect your personality and style. Whether you prefer classic roses or whimsical wildflowers, the freedom of creativity is limitless.
Essential Tools and Products for Floral Nail Art

Before diving into the exciting world of floral nail art, you need a set of essential tools and products. Having the right items on hand will streamline your process and elevate your designs.
Tools
Nail Polish: Invest in a selection of colors, including base colors, vibrant shades, and various finishes (glossy, matte, glitter). Consider pastel hues for spring.
Base Coat: A protective layer that prevents staining and helps polishes adhere better.
Top Coat: An essential layer that adds shine, prolongs the life of your design, and protects it from chipping.
Nail Art Brushes: A set of fine-tipped brushes will help you create intricate floral designs. Look for multiple sizes for different effects.
Dotting Tools: These come with rounded tips of varying sizes, perfect for creating dots of different dimensions that can represent flower centers or petals.
Striping Tape: Thin tape helps create clean lines and can enhance geometric floral designs.
Makeup Sponges: Useful for blending colors and creating gradient effects in your nail art.
Nail Stamping Kits: If you prefer a quick method, nail stamps can transfer detailed floral designs effortlessly.
Tweezers: Helpful for picking up small embellishments like rhinestones, pearls, or foil pieces.
Nail Products
Nail Polish Remover: An acetone-free remover is gentler on nails and cuticles.
Cuticle Oil: Nourishes and hydrates cuticles, keeping them healthy and looking great.
Nail Glue: If you plan to use embellishments or press-on nails, nail glue is essential.
Preparing Your Nails for Floral Art
Preparation is key to achieving beautiful nail art. Here’s how to properly prep your nails before decorating them with floral designs:
1. Clean and Shape
Start by washing your hands thoroughly and removing any old nail polish. Next, file your nails into your desired shape—square, oval, or almond—using a gentle nail file.
2. Push Back Cuticles
Using a cuticle pusher or orange stick, gently push back your cuticles to create a neat edge. This step helps allow for better polish application and enhances the overall look.
3. Buff Your Nails
Lightly buff the surface of your nails using a buffer to create a smooth canvas. This step will help the base coat adhere better.
4. Apply Base Coat
Once your nails are clean and prepped, apply a thin layer of base coat to protect your natural nails and improve polish adhesion.
Floral Nail Art Techniques to Try
With your nails prepped and ready, it’s time to explore various floral nail art techniques. These techniques can help you take your floral designs to the next level.
1. Basic Floral Dots
This technique is perfect for beginners and involves creating simple flower shapes using dotting tools.
How to Do It
- Start with a base color of your choice and let it dry completely.
- Using a dotting tool, dip it into a contrasting polish color.
- Make five dots in a circular shape to form a flower.
- Use a smaller dotting tool to create a dot in the center of the flower for detail.
- Repeat on as many nails as desired and seal with a top coat.
2. Floral Accent Nails
Floral accents on a single nail can create a focal point while keeping the overall design chic.
How to Do It
- Apply your base color to all nails.
- Select one or two nails to feature floral designs.
- Use a nail art brush or dotting tool to create petals and details on the chosen nail(s).
- Finish with a top coat for shine and protection.
3. Water Marble Flowers
Water marbling allows you to create stunning designs with a lovely flow of colors. This technique can be particularly effective for floral patterns.
How to Do It
- Fill a small cup or bowl with room temperature water.
- Drop different nail polish colors onto the water's surface, one at a time, allowing them to spread.
- Use a toothpick to swirl the colors together in a floral pattern.
- Dip your nail into the water at an angle, making sure to cover the desired area, then pull it out straight to reveal the marbled design.
- Clean up excess polish around the nail with a Q-tip or orange stick and top coat.
4. Hand-Painted Floral Designs
For those with a bit more experience, hand-painting flowers can be an exquisite way to showcase your creativity.
How to Do It
- Apply a base color and let it dry.
- Use a fine nail art brush to draw petals by creating curved strokes.
- Layer the petals for depth and color variation.
- Add details like leaves using green polish.
- Finish with a top coat to protect your handiwork.
5. Floral Stamping
Stamping is a perfect shortcut for achieving intricate floral designs without the need for advanced hand-painting skills.
How to Do It
- Apply a base color to your nails.
- Use a stamping plate with floral designs to collect polish with a scraper.
- Roll the stamper over the polished design to transfer it to your nail.
- Repeat for each nail and seal with a top coat for a durable finish.
Inspiration for Floral Nail Art Designs
Need a little inspiration for your floral creations? Here are some design ideas to spark your creativity:
1. Classic Rose Nails
Roses are a timeless floral choice for nail art. Opt for soft pinks and greens for a romantic vibe or go bold with deep reds and gold accents.
2. Delicate Daisy Patterns
Daisies bring a touch of whimsy to your nails. Their simplicity makes them easy to recreate, and they can be painted in various colors.
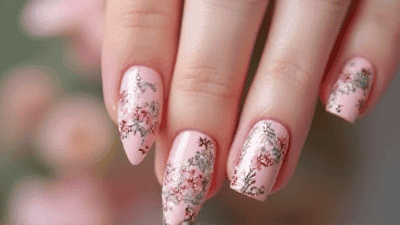
3. Spring Wildflowers
Combine different floral designs to mimic a wildflower field. This eclectic approach allows for vibrant colors and mixed flower types.
4. Tropical Blooms
Capture the essence of summer with tropical floral designs such as hibiscus or plumeria flowers. Bright colors will make your nails pop.
5. Minimalist Flower Art
For a more subdued look, opt for minimalist floral designs using one or two colors and simple shapes. This style is perfect for any occasion.
6. Vintage Floral Patterns
Creating a vintage floral aesthetic with muted tones and intricate designs can give your nails an elegant look reminiscent of classic wallpaper patterns.
Troubleshooting Common Floral Nail Art Issues

Even the most skilled nail artists encounter challenges from time to time. Here are some common issues and solutions you may face while creating floral nail art:
1. Uneven Application
If your polish appears streaky or blobby, ensure each layer is fully dry before applying the next. Consider using a quality brush for smoother application.
2. Smudged Designs
To avoid smudges when painting or applying topcoats, make sure your designs are completely dry. If needed, use a quick-dry topcoat to seal your design fast.
3. Chipping or Peeling
For a longer-lasting manicure, make sure to apply thin layers of polish and always use a base and top coat. Reapply the top coat every few days for added protection.
4. Bubble Formation
Bubbles can form in polish due to excessive shaking. Instead of shaking, roll the bottle between your palms. Apply polish in thin layers to minimize bubbling.
5. Difficulty with Intricate Designs
If you find yourself struggling with detailed designs, consider using nail stampers or stickers. These can provide a polished look with less effort.
Nail Care Tips for Floral Nail Art Lovers
While nail art is a fun way to express your style, maintaining healthy nails is essential for achieving the best results:
1. Keep Nails Clean and Dry
Regularly wash your hands and keep your nails dry to prevent the growth of bacteria or fungus. This is especially important before applying polish.
2. Moisturize Regularly
Apply cuticle oil and hand cream daily to keep your nails and cuticles hydrated. Healthy cuticles promote better nail health and polish adhesion.
3. Avoid Overexposure to Chemicals
Frequent exposure to harsh chemicals in nail polish removers can damage your nails and cuticles. Opt for gentle, acetone-free removers whenever possible.
4. Allow Nails to Breathe
Give your nails a break from polish occasionally to allow them to recover and prevent discoloration. This can help maintain their natural strength and beauty.
5. Maintain a Balanced Diet
Nails are a reflection of your overall health. Eating a balanced diet rich in vitamins, minerals, and protein helps support healthy nail growth and strength.
The Joy of Creating Floral Nail Art
Nail art is a delightful form of self-expression that allows individuals to showcase their creativity and style. As spring brings renewed beauty and vibrancy, floral nail designs offer the perfect way to celebrate the season. With this guide, you now have the tools, techniques, and inspiration needed to create stunning floral nail art in your own home.
Whether you prefer simple dot flowers or intricate hand-painted designs, there is no limit to the creativity you can express through your nails. Embrace the beauty of spring, gather your nail supplies, and let your artistic journey bloom. Happy painting!